How to Run Your First Neighborhood Swap Meet
A practical walkthrough for organizing a swap meet with nothing more than a driveway and a group text.
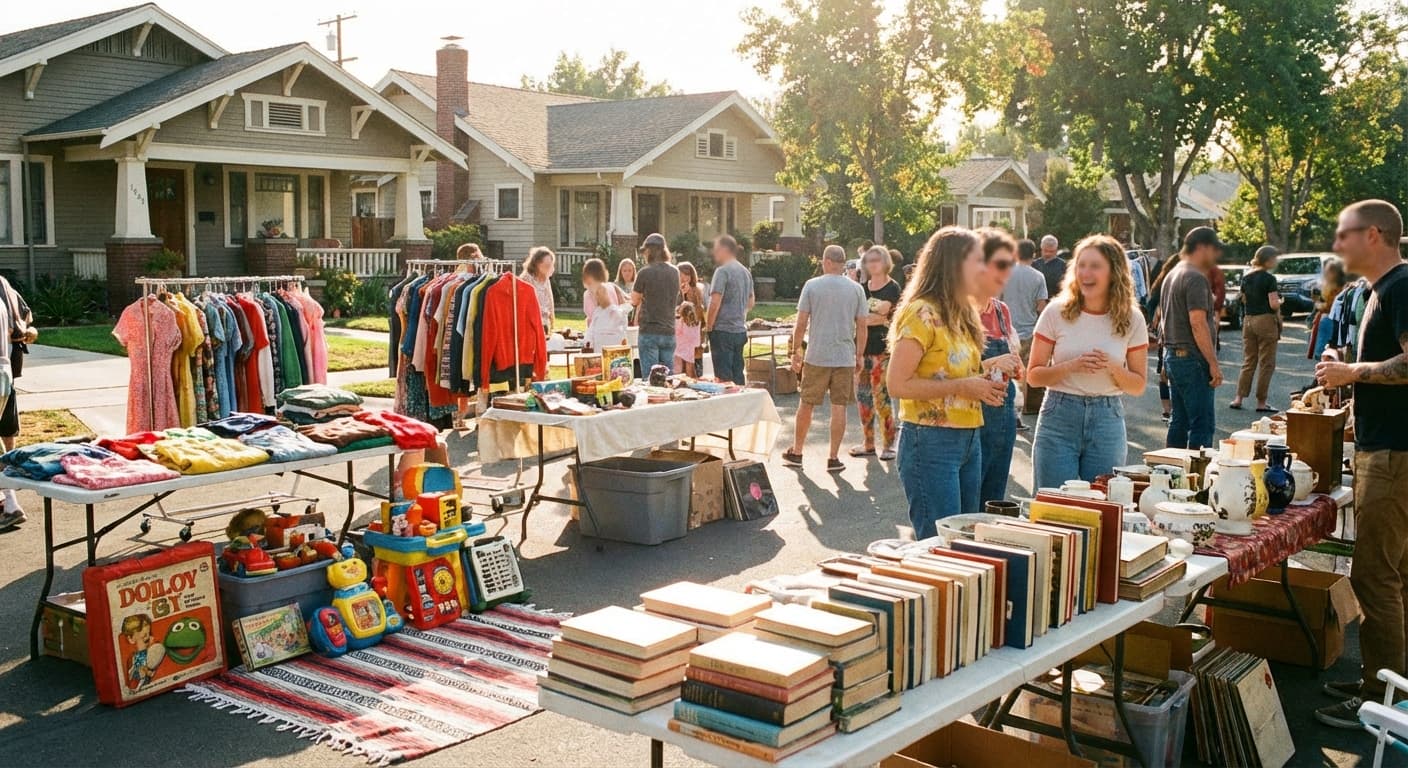
Most people overthink their first swap meet. They imagine needing permits, insurance, and a marketing budget. The reality? You need a date, a place, and about ten people willing to clean out their closets.
Pick a Spot That's Already Familiar
Skip the community center rental for your first event. (Save the venue hunt for when you outgrow the driveway.) A driveway works. So does a church parking lot, a cul-de-sac, or someone's backyard. The best first venue is free, has parking nearby, and doesn't require you to fill out forms three weeks in advance.
A few things to think about:
- Weather backup: If you're outdoors, pick a date with a rain alternative. "We'll move to the garage" is a perfectly fine plan B.
- Foot traffic: A spot on a busier street means random walkers might stop by. That's a bonus, not something to plan around.
- Size: For 5-15 participants, you need roughly the space of two or three parking spots per person. A standard two-car driveway fits about 3-4 sellers comfortably.
Don't get stuck comparing venues. Your neighbors already know where you live. Use that.
Set the Rules Before You Share the Date
This is where first-time organizers skip ahead and regret it later. Before you text anyone, decide:
-
Swap-only, sell-only, or both? Mixed events draw the biggest crowd because people can participate however they want. Pure swap events are fun but harder to fill if people don't have items of similar value. If you allow trading, share some bartering tips with participants beforehand.
-
What's the setup? Each person brings a folding table and their own items? Or are you collecting everything into one area? Individual tables are easier to manage. Let people handle their own stuff.
-
What about leftovers? This matters more than you'd expect. At the end of every swap meet, there are unsold items. Have a plan: a donation box for a local charity, or a "free pile" for the last hour. If you don't decide this upfront, you'll end up with other people's junk on your lawn. (There's a good reason to care about where leftovers end up.)
-
Money handling: If selling is allowed, each seller handles their own transactions. You're not the cashier. Make this clear. Venmo and cash work fine.
Write these rules down in three or four sentences and send them when you invite people.
Get 10 People to Say Yes
You don't need a flyer campaign. You need a group text.
Start with people you know who've mentioned decluttering, moving, or doing a garage sale. That's your core. Ten confirmed participants is plenty for a good first event. Fifteen is great. Five is too few, because two will cancel.
When you invite people, tell them three things:
- The date and time (Saturday mornings between 8am and noon work best)
- What to bring (their items plus a table or blanket to display on)
- The rules you wrote in step two
Give people at least two weeks' notice. Three is better. One week is too tight for most to sort through their stuff.
If you want to go beyond your inner circle, post in your neighborhood Facebook group or Nextdoor. Keep the post simple: "Hosting a swap meet at [location] on [date]. Bring stuff to trade or sell. Reply if you want a spot." You'll get responses.
The Day-Of Checklist
On the morning of the event, give yourself about 30 minutes of setup before anyone arrives. (For a full seller gear list, see the swap meet packing list.)
- Signs: Two or three handwritten signs pointing toward the location. Cardboard and a Sharpie. Don't overthink it.
- Layout: Know where each person's table goes before they show up. Leave room between tables for people to walk and browse. Cramped layouts kill the mood.
- A free table: Set up one table where anyone can dump items they want to give away. This becomes the most popular spot by mid-morning.
- Cash reminder: Text sellers the day before to bring small bills. You'd be surprised how many people show up with nothing but twenties. If participants need help figuring out what to charge, share our pricing guide.
- Bags: Keep a stash of grocery bags or tote bags for buyers who didn't bring their own.
Your job as the organizer isn't to manage every detail. Show up early, point people to their spots, and then enjoy it. The event runs itself once tables are set up.
After It's Over
Do two things before you forget:
-
Send a thank-you text to everyone who participated. Ask if they'd do it again. Most will say yes. A few will have suggestions. Both are useful.
-
Handle the leftovers. If you set up a donation plan beforehand, execute it the same day. Don't let unclaimed items sit in your garage for a month.
If even half the people say they'd come back, you've got the start of a recurring tradition. The second one is always easier: people know the format, they tell friends, and your attendance grows on its own.
The biggest mistake with a first swap meet isn't doing it wrong. It's never doing it because you convinced yourself it needed to be bigger than it does.